
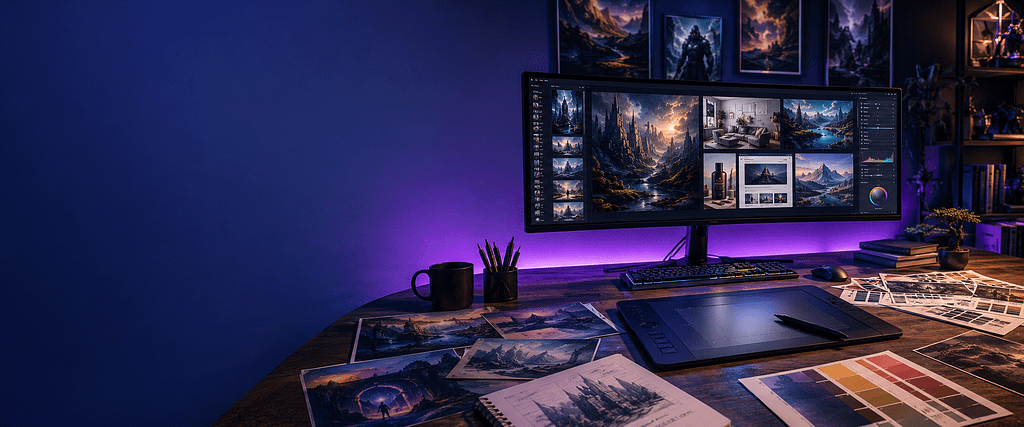
Create illustrative affiliate visuals with clear briefs, reusable prompts, and checks for accuracy, readability, and web performance.
What is a website hero image? A hero image is the large main image near the top of a webpage, often beside or behind its headline and a button such as “Start Here.” It introduces the page’s topic and sets the visual tone. For example, an affiliate-marketing guide might use a wide workspace illustration above the article. A featured image is the thumbnail used in article listings or social previews; the same picture can serve both roles, but it needs to fit each layout.
⭐ Key Takeaways
By the end of this guide, readers will know how to:
- Understand what makes Midjourney different from other image generators.
- Create stronger prompts with subjects, settings, lighting, styles, and composition.
- Produce featured images, advertisements, product visuals, and social graphics.
- Maintain a consistent visual style across a website or campaign.
- Edit and expand images using Midjourney’s web tools.
- Understand subscriptions and important commercial-use considerations.
Documentation checked October 12, 2026: Midjourney’s version documentation lists V8.2 as the default. Feature compatibility varies by model; check the documentation and your account before following an editing tutorial.
On this page
- 1. What Midjourney does
- 2. Choose useful marketing visuals
- 3. Write a clear prompt
- 4. Worked example: hero, pin, and thumbnail
- 5. Keep a consistent style
- 6. Refine and prepare images
- 7. Connect images to publishing
- Costs, terms, and privacy
Introduction
Why Midjourney Matters for Affiliate Marketers
Visual presentation plays a major role in how visitors experience an affiliate website. Readers may arrive because of a headline or search result, but strong featured images, comparison graphics, social-media visuals, and product concepts can make the content feel more professional and trustworthy.
Midjourney gives affiliate marketers a way to create distinctive visual assets without relying entirely on generic stock photography. You can use it to develop website hero images, illustrated tutorials, Pinterest graphics, advertising concepts, ebook covers, digital-product artwork, branded backgrounds, and creative imagery tailored to a particular audience.
Its biggest strength is visual quality and creative interpretation. Midjourney is especially useful when you want imagery that feels cinematic, artistic, premium, or difficult to find in a traditional stock-photo library. Its current tools also support style references, personalization, image prompting, moodboards, editing, and other controls that can help keep a collection of images visually consistent.
However, attractive images alone do not create a successful marketing campaign. The visuals must still support the article, clarify the message, match the brand, and help readers understand what comes next. The most effective approach is to use Midjourney as a creative production tool while allowing your marketing strategy and audience knowledge to guide every image you generate.
Chapter 1: What Is Midjourney?
Midjourney is an AI-powered creative platform that generates images from written prompts and visual references. Rather than requiring traditional illustration or photography skills, it allows users to describe a subject, setting, mood, composition, and style, then produces several visual interpretations that can be refined further.
Today, users can create through Midjourney’s website as well as through Discord. The web experience includes tools for creating, organizing, and modifying images, while the Editor supports functions such as inpainting, Remix, Pan, and Zoom Out.
What makes it different?
Midjourney is particularly strong at:
- Cinematic and imaginative scenes
- Premium editorial artwork
- Fantasy and concept art
- Photorealistic lifestyle imagery
- Distinctive lighting and atmosphere
- Strong visual composition
- Style exploration and creative variations
It is less focused on drag-and-drop marketing design than Canva and less tightly integrated into a general writing workflow than ChatGPT. Its role is more specialized: turning creative direction into high-impact visual imagery.
Current access and pricing
Midjourney does not currently offer a general free trial through its website or Discord. Official plans begin at $10 per month, with Standard, Pro, and Mega tiers providing higher GPU allowances and additional capabilities.
Important commercial-use note
Midjourney’s official guidance says subscribers generally own the images and videos they create, subject to its terms. Businesses generating more than $1 million in annual gross revenue need a Pro or Mega plan for company commercial use.
💡 Pro Tip
Do not begin with complicated parameters. Start with a clear description of the subject, setting, mood, lighting, composition, and intended use. Once Midjourney understands the basic concept, refine it through variations and editing.
⭐ Chapter Summary
Midjourney is a specialized visual-creation platform best known for polished, imaginative, and highly styled imagery. For affiliate marketers, it can replace generic stock visuals with original images designed specifically for articles, campaigns, and digital products.
➜ Transition to Chapter 2
Now that readers understand what Midjourney is, Chapter 2 will explain why affiliate marketers use it and which marketing assets it creates especially well.
Chapter 2: Why Affiliate Marketers Use Midjourney
Affiliate marketing is a competitive business where first impressions matter. Long before a visitor reads your content or clicks an affiliate link, they begin forming an opinion based on how your website looks. Relevant visuals can clarify a page and make its presentation consistent. Their effect on clicks or engagement must be measured; attractive artwork is not evidence of product quality.
For many years, affiliate marketers relied on stock photography or expensive custom graphic design. While stock images are convenient, they’re often overused and rarely reflect your unique brand. Custom photography and illustration can be expensive and time-consuming, especially for smaller websites and solo entrepreneurs.
Midjourney changes that equation by allowing marketers to create original, eye-catching images tailored specifically to their content. Instead of settling for generic visuals, you can generate custom graphics that support your message, reinforce your brand, and make your website stand out from competitors.
Whether you’re publishing product reviews, comparison articles, tutorials, or informational blog posts, unique imagery helps create a more professional experience that encourages visitors to continue reading.
🎯 Where Midjourney Excels
Midjourney is especially effective for creating marketing visuals that don’t need to represent an exact real-world product but instead communicate ideas, emotions, and concepts. Some of the most valuable applications include:
- Website hero images
- Blog featured images
- Digital product covers
- Lead magnet graphics
- Pinterest pins
- YouTube thumbnails
- Social media graphics
- Ebook covers
- Marketing banners
- Concept artwork
- Lifestyle imagery
- Background graphics
A consistent brief can give your images a shared visual direction. Generated output is not guaranteed to be unique, accurate, or ready to publish.
⭐ Why Custom Images Improve Your Brand
Every successful affiliate website develops a recognizable style. Visitors begin associating certain colors, layouts, and visual themes with your content. Midjourney makes it possible to build that consistency without hiring a professional designer.
Using similar lighting, color palettes, compositions, and artistic styles across your articles creates a stronger brand identity. Instead of looking like a collection of unrelated blog posts, your website begins to feel like a unified resource with its own personality.
Consistent visuals help visitors recognize your articles. Evaluate readability and relevance first, then use actual traffic data to assess engagement.
🚀 Practical Ways to Use Midjourney
As your affiliate business grows, you’ll discover that Midjourney can support almost every stage of your content creation workflow.
For example, you can create:
- Hero images for cornerstone guides
- Illustrations for tutorial articles
- Product comparison graphics
- Website category banners
- Infographics
- Email newsletter headers
- Facebook ad concepts
- Pinterest marketing campaigns
- Digital workbook covers
- Branded backgrounds for videos and presentations
The ability to produce these assets on demand gives you greater creative freedom while reducing the ongoing cost of purchasing stock photography or outsourcing graphic design.
💡 Pro Tip
Rather than generating a completely different style for every article, choose a consistent visual theme for your website. Using similar lighting, colors, composition, and artistic direction across your content helps strengthen your brand and creates a more professional appearance.
⭐ Chapter Summary
Midjourney helps affiliate marketers move beyond generic stock photography by making it easy to create original, high-quality visuals that enhance blog posts, social media campaigns, digital products, and marketing materials. Consistent custom imagery strengthens your brand, improves reader engagement, and helps your content stand out in a crowded marketplace.
➜ Transition to Chapter 3
Now that you understand why Midjourney is such a valuable tool for affiliate marketers, the next step is learning how to communicate effectively with the AI. In Chapter 3, you’ll discover how to write better prompts that consistently produce the images you envision, along with practical techniques for refining and improving your results.
Chapter 3: How to Write Better Midjourney Prompts
Describe the scene you need, using a small set of concrete details. Extra adjectives do not automatically improve a prompt. Begin with one subject and a composition that fits the destination; compare the output with your brief before adding more controls.
- Subject: what should the viewer notice first?
- Setting: where is the scene taking place?
- Composition: where should objects sit, and where must space remain clear?
- Lighting: choose one direction such as soft daylight.
- Style: choose a coherent visual treatment, such as editorial illustration.
- Format: add the aspect ratio for the planned asset.
Turn a vague request into a usable brief
Vague: “Modern office.”
More focused: Editorial illustration of a clean home-office desk, notebook and blank planning cards on the right, soft daylight, blue white and gray palette, uncluttered wall on the left, no logos, no lettering --ar 16:9
The second prompt describes a subject, style, placement, and format. It does not claim to show an actual product dashboard. If text or a logo appears anyway, edit or reject the result. A request to leave an area blank is an instruction to inspect, not a guaranteed outcome.
Refine one problem at a time
If the scene is cluttered, reduce the number of objects. If it has insufficient headline space, change the placement instruction or reframe the composition. If a style feels inconsistent, reuse the approved palette and visual treatment. Save the model, prompt, changes, and final file together so you can understand what produced a usable result.
Chapter 4 applies that brief to three marketing formats and explains which details to add later in a design editor.
Chapter 4: Creating Images That Support Your Content
Start with the article’s message and decide what the visual should explain. A generic workspace may suit an introduction, but it cannot demonstrate how a product works. For feature comparisons, use an accurate table; for a tutorial, use your real screenshots or a diagram you can verify.
Worked brief: one article, three useful assets
Imagine an article teaching solo creators how to plan four captioned videos each month. The example below is a creative brief, not a Midjourney output test or proof that these visuals improve traffic. Its visual theme is a clean blue, white, and gray workspace. The scene illustrates planning and does not depict a real product interface.
| Asset | Composition | Editorial use |
|---|---|---|
| Website hero image (main image near the top of the page) | 16:9, desk scene on the right, quiet space on the left | Introduces the planning topic; add the headline as editable page text. |
| Pinterest pin background | 2:3, workspace detail in the lower half, simple upper background | Add a readable headline in your design editor and link to the matching article. |
| YouTube thumbnail background | 16:9, one clear planning object, space for a short title | Supports a video that actually covers the planning method. |
Midjourney’s aspect-ratio documentation explains the --ar parameter. The ratio controls proportions, not exact output dimensions. Inspect the exported dimensions and resize for the final layout.
Prompt 1: website hero image
Copyable starting point: Editorial illustration of a tidy desk used by a solo video creator, closed notebook with four simple blank planning cards, muted blue white and gray palette, soft natural daylight, desk objects concentrated on the right, uncluttered wall and generous empty space on the left, no visible software interface, no logos, no lettering --ar 16:9
Prompt 2: Pinterest pin background
Copyable starting point: Vertical editorial illustration of a simple video planning workspace, four blank cards and a notebook arranged in the lower half, soft blue white and gray palette, natural daylight, clean upper half with room for a headline, one clear focal point, no logos, no lettering --ar 2:3
Prompt 3: YouTube thumbnail background
Copyable starting point: Wide editorial illustration of four blank planning cards beside a notebook on a clean desk, clear close view of the cards on the right, simple pale blue background on the left, strong subject separation, consistent blue white and gray palette, no software dashboard, no logos, no lettering --ar 16:9
These are starting prompts, not guaranteed layouts. Reject results with garbled text, extra objects, fake logos, or crowded headline areas. If several details compete, simplify the prompt rather than adding more instructions. Midjourney’s prompt basics is the reference for prompt structure.
Add the actual message after generation
Use a design editor for precise headlines, logos you may use, and factual labels. For the pin, a headline such as “Plan 4 Captioned Videos” describes the task. Avoid “Guaranteed Viral Videos” or a revenue claim that the article cannot support. Check the image at its real display size; a readable desktop preview may become cramped on a phone.
Choose real evidence for product claims
- Use real permitted product photographs when shape, color, or included accessories matter.
- Use genuine screenshots for interface steps, with private details removed.
- Build comparison tables from verified facts; do not ask an image generator to invent features or prices.
- Identify an illustrative scene where readers might otherwise mistake it for product-test evidence.
- Check that the headline, image, and destination page make the same supported promise.
For review images and evidence, use the trustworthy affiliate review checklist. After the article is complete, follow the Reels, Shorts, Pins, and email workflow to choose a manageable set of assets rather than publishing every possible format.
Prepare the image for this site
For a landscape hero, this site aims for 1920 × 1080 pixels with roughly the left 35–40% kept clear when a heading needs space. Use 1200 × 1800 pixels for a portrait section illustration. These are our layout targets, not dimensions promised by the generation command.
Export an appropriate web format, compress without visible damage, and aim to keep a hero under 250 KB when practical. Keep the original separately for future edits. Write alt text from what the finished image actually shows, not from the prompt. If an image is purely decorative and conveys no information, use empty alt text rather than stuffing keywords into it.
Chapter 5: Building a Consistent Brand Style with Midjourney
One of the biggest mistakes new affiliate marketers make is creating every image in a completely different style. One article might use bright modern photography, the next uses watercolor illustrations, and another uses dark fantasy artwork. While each image may look impressive on its own, the overall website feels inconsistent and unprofessional.
Successful brands develop a recognizable visual identity. When visitors repeatedly see similar colors, lighting, composition, and design choices, they begin associating those visuals with your business. Over time, this consistency builds familiarity, trust, and credibility.
Midjourney makes it easier than ever to maintain that consistency because you can intentionally guide the style of every image you create. Rather than generating random artwork, you can build a repeatable visual system that becomes part of your brand.
🎨 Define Your Visual Identity
Before generating hundreds of images, decide how you want your website to look.
Ask yourself:
- Should my brand feel modern or traditional?
- Bright and energetic or dark and dramatic?
- Minimalist or highly detailed?
- Corporate or creative?
- Luxury or casual?
Once you’ve established your overall direction, every image should reinforce that style.
🌈 Choose a Consistent Color Palette
Color is one of the easiest ways to create brand recognition.
For example, your website uses:
- Blue
- White
- Gray
By consistently including these colors in your Midjourney prompts, your articles naturally feel connected.
Example:
“Modern home office, blue and white color palette, soft gray accents, clean professional workspace, ultra-realistic editorial photography.”
Small details like this create visual consistency across dozens—or even hundreds—of pages.
💡 Reuse Successful Prompt Structures
One of the fastest ways to build a recognizable brand is to reuse your best prompt framework instead of starting from scratch every time.
Example style brief: editorial illustration, soft daylight, blue white and gray palette, simple background, one clear subject. Keep that brief and change the task shown in the scene.
Now simply change the subject:
- AI Writing
- SEO
- Email Marketing
- Blogging
- Social Media
- Digital Products
The overall visual style remains consistent while each image supports a different topic.
📐 Keep Your Composition Consistent
Many successful websites follow the same composition throughout their content.
Example style brief: editorial illustration, soft daylight, blue white and gray palette, one clear subject, simple background. Keep this treatment while changing the task shown in the scene.
- Portrait images for article sections
- Landscape hero images
- Left-side negative space for headings
- Eye-level camera angle
- Soft natural lighting
- Clean backgrounds
Readers may not consciously notice these patterns, but together they create a polished, professional appearance.
🖼️ Build a Prompt Library
As you create more content, save your best-performing prompts in a dedicated document or spreadsheet.
Organize them by category, such as:
- Hero Images
- Blog Featured Images
- Category Banners
- Product Reviews
- Pinterest Pins
- Social Media Graphics
- Ebook Covers
- Landing Pages
Over time, you’ll build a personal library of proven prompts that speeds up content creation and helps maintain a consistent brand identity across your entire website.
🚫 Avoid Common Branding Mistakes
Consistency also means knowing what to avoid.
Try not to:
- Change artistic styles dramatically between articles
- Use random color palettes
- Mix cartoon illustrations with realistic photography
- Create cluttered compositions
- Ignore your website’s overall design language
Instead, think of every image as another piece of your brand story.
💡 Pro Tip
Create a “Master Brand Prompt” that includes your preferred lighting, color palette, composition, and artistic style. Use it as the foundation for every new image you generate. This simple habit can dramatically improve visual consistency while reducing the amount of prompt writing needed for future projects.
⭐ Chapter Summary
A recognizable visual style helps your website stand out in a crowded marketplace. By consistently using the same colors, lighting, composition, and prompt structure, you can transform Midjourney from an image generator into a powerful branding tool. The result is a website that looks more professional, builds trust with visitors, and reinforces your identity every time someone views your content.
➜ Transition to Chapter 6
Now that you’ve learned how to create beautiful, consistent visuals, it’s time to refine them. In the next chapter, you’ll discover how to use Midjourney’s editing features and iterative workflow to improve image quality, make targeted adjustments, and transform good images into exceptional marketing assets.
Chapter 6: Editing and Refining Your Images
Creating a beautiful image is only the beginning of the creative process. Professional marketers rarely use the first version of an image without making adjustments. Instead, they refine, improve, and optimize their visuals until they perfectly match the message they’re trying to communicate.
Midjourney provides several powerful editing and refinement tools that allow you to improve compositions, expand scenes, replace unwanted elements, and generate multiple creative variations. These features make it possible to transform a good image into one that feels polished, intentional, and ready for publication.
Rather than viewing image generation as a one-click process, think of Midjourney as a creative partner that helps you gradually develop the exact visual you’re looking for.
🔄 Start with Multiple Variations
One of the biggest advantages of Midjourney is its ability to generate several interpretations of the same prompt.
Instead of choosing the first image you see, compare the different results and ask yourself:
- Which composition is strongest?
- Which image best supports my content?
- Does the lighting fit my brand?
- Which version looks the most professional?
- Is there enough space for headlines or call-to-action text?
Sometimes the strongest image isn’t immediately obvious. Looking at several variations often sparks new ideas or reveals a composition that works even better than your original concept.
🎨 Fine-Tune the Details
After selecting your favorite version, continue refining the image.
Consider improving:
- Lighting
- Color balance
- Background elements
- Camera angle
- Composition
- Subject placement
- Visual focus
- Overall mood
Small refinements often make the biggest difference. A slight adjustment to lighting or composition can transform an average image into one that looks professionally produced.
🖌️ Expand and Reframe Your Images
Sometimes an image is excellent but doesn’t fit the layout of your website.
Rather than starting over, you can expand the scene or adjust the composition to create:
- Wide website hero banners
- Portrait article graphics
- Square social media posts
- Pinterest-friendly vertical images
- Presentation backgrounds
Planning your final use before editing saves time and helps ensure your visuals fit naturally into your website design.
🧩 Maintain Consistency Across a Project
If you’re creating several images for one article or marketing campaign, keep them visually connected.
Use similar:
- Lighting
- Color palette
- Camera angles
- Artistic style
- Composition
- Overall mood
A cohesive set of images creates a stronger impression than several unrelated graphics, making your content feel more polished and professionally designed.
🚀 Build an Efficient Workflow
Experienced creators rarely generate one image and move on.
Instead, they follow a repeatable workflow:
- Write a detailed prompt.
- Generate several variations.
- Select the strongest composition.
- Refine and edit the image.
- Export the final version.
- Optimize it for web performance.
- Add descriptive alt text before publishing.
This process ensures every image contributes to your content strategy rather than simply filling space on the page.
⚡ Optimize Images for Your Website
After exporting your image, take a few minutes to optimize it before uploading.
Best practices include:
- Resize images to fit your website layout.
- Compress files to improve page speed.
- Use descriptive filenames.
- Add meaningful alt text for accessibility and SEO.
- Choose modern formats such as WebP when supported.
Fast-loading pages improve the visitor experience and can contribute to better search performance over time.
💡 Pro Tip
Don’t delete earlier versions of your favorite images. Save your best variations in organized folders so you can reuse or adapt them for future blog posts, social media campaigns, email newsletters, or digital products. Building a personal image library can save hours of work as your website grows.
⭐ Chapter Summary
The best Midjourney images rarely come from the first generation alone. By reviewing multiple variations, refining compositions, expanding scenes, maintaining a consistent visual style, and optimizing images for the web, you can create professional marketing assets that strengthen your brand and improve the overall quality of your content.
➜ Transition to Chapter 7
Now that you’ve learned how to generate, refine, and optimize professional-quality images, the final step is understanding how Midjourney fits into a complete affiliate marketing workflow. In the last chapter, we’ll combine everything you’ve learned into a practical system you can use to create content faster, maintain a consistent brand, and build a stronger online business.
Chapter 7: Building a Complete AI Image Workflow for Affiliate Marketing
Creating high-quality images is only one part of a successful affiliate marketing strategy. The real advantage comes from integrating Midjourney into a complete content creation workflow where AI tools work together to help you research topics, write articles, design graphics, optimize for search engines, and publish content more efficiently.
Instead of thinking of Midjourney as a standalone image generator, think of it as one component of a larger AI-powered marketing system. Each tool has its own strengths, and when combined, they allow you to produce professional-quality content faster while maintaining a consistent brand identity across your entire website.
For affiliate marketers, this integrated approach saves time, improves productivity, and creates a smoother publishing process from the initial idea to the finished article.
🧠 Step 1: Research Your Topic
Every successful article begins with research.
Use AI writing assistants to:
- Discover low-competition keywords
- Brainstorm article ideas
- Research audience questions
- Build article outlines
- Organize supporting information
The better your research, the easier it becomes to create visuals that accurately support your content.
✍️ Step 2: Write the Article
Once you’ve identified your topic, create your content using your preferred AI writing assistant.
Develop:
- Introduction
- Headings
- Product reviews
- Tutorials
- Comparisons
- Calls to action
- Frequently Asked Questions
At this stage, your article structure determines the types of images you’ll need throughout the page.
🎨 Step 3: Create Supporting Images with Midjourney
Now use Midjourney to produce visuals specifically designed for your article.
Examples include:
- Hero image
- Featured image
- Section illustrations
- Product concept graphics
- Comparison backgrounds
- Call-to-action graphics
- Resource page artwork
Because these images are created specifically for your content, they help reinforce your message rather than simply filling empty space.
⚡ Step 4: Optimize Everything for Your Website
Before publishing, prepare every asset for maximum performance.
This includes:
- Compressing images
- Using WebP where appropriate
- Writing descriptive alt text
- Optimizing filenames
- Checking mobile responsiveness
- Reviewing page speed
- Ensuring consistent branding
Small improvements at this stage create a better experience for both visitors and search engines.
🚀 Step 5: Publish and Promote
Publishing is only the beginning.
Repurpose your visuals into multiple marketing assets.
Create:
- Pinterest pins
- Facebook graphics
- Instagram posts
- LinkedIn banners
- Email headers
- YouTube thumbnails
- Presentation graphics
One Midjourney project can support an entire marketing campaign across multiple platforms.
🔄 Build a Repeatable Content System
The most successful affiliate marketers don’t create content randomly—they follow a repeatable process.
Use this sequence: validate the topic, approve an evidence-based outline, draft and check the article, create supporting illustrations, optimize files, publish, promote, and review the results.
Once you’ve completed this process a few times, it becomes significantly faster and more efficient. Instead of wondering what to do next, you simply follow the same proven workflow for every new piece of content.
🌟 Midjourney’s Role in Your AI Toolkit
Midjourney is one of several AI tools that can strengthen your affiliate marketing business.
Here’s how it complements the other guides in your AI Learning Center:
| AI Tool | Primary Strength |
|---|---|
| 🤖 ChatGPT | Brainstorming, writing, and content creation |
| 🧠 Claude | Long-form writing and document analysis |
| 💎 Google Gemini | Research, organization, and Google Workspace productivity |
| 🎨 Midjourney | Premium AI-generated images and creative visuals |
| 🖼️ Canva AI | Marketing graphics and social media design |
| 🔍 AI SEO Tools | Search optimization and keyword research |
When used together, these tools create a powerful AI-powered workflow that helps you produce better content in less time.
💡 Pro Tip
Don’t try to master every AI tool at once. Start by building a simple workflow that combines one writing assistant with one image generator. As you become more comfortable, gradually add additional tools that solve specific problems in your content creation process.
⭐ Chapter Summary
Midjourney is far more than an AI image generator. It becomes a valuable part of a complete affiliate marketing workflow that includes research, writing, visual creation, optimization, and promotion. By combining Midjourney with other AI tools, you can create professional-quality content more efficiently while maintaining a consistent brand across your website and marketing channels.
➜ Final Transition
You’ve now learned how to create professional AI-generated images, write stronger prompts, maintain a consistent visual identity, refine your artwork, and integrate Midjourney into a complete affiliate marketing workflow.
The final section will bring everything together with practical advice for making Midjourney a long-term part of your content strategy, along with recommendations for continuing your AI journey through the other guides in the AI Learning Center.
Choose one article and produce one visual that serves its reader. Review the composition, evidence, rights, readability, and file size before publishing. Record what you changed so you can reuse the useful parts of the brief.
⭐ Key Takeaways
- AI-generated images can dramatically improve the visual quality of your affiliate marketing content.
- Strong prompts produce stronger results—clarity, detail, and consistency matter.
- Develop a recognizable visual style by reusing successful prompt structures and color palettes.
- Midjourney is ideal for hero images, featured images, digital products, social media graphics, and website branding.
- Optimize every image for web performance before publishing.
- Build a repeatable workflow that combines research, writing, image creation, optimization, and promotion.
- Continue experimenting and refining your prompts to improve your results over time.
📚 Continue Your AI Learning Journey
Now that you’ve learned how to create professional AI-generated images, continue building your AI skills with the rest of the guides in the AI Learning Center.
Recommended Next Reads
🤖 The Complete Guide to ChatGPT for Affiliate Marketers
Learn how to brainstorm ideas, write articles, create marketing campaigns, and streamline your content creation process.
🧠 The Complete Guide to Claude for Affiliate Marketers
Discover advanced prompting techniques, long-form writing strategies, and document analysis workflows.
💎 The Complete Guide to Google Gemini for Affiliate Marketers
Learn how Gemini improves research, planning, organization, and productivity within Google’s ecosystem.
✍️ Best AI Writing Tools for Affiliate Marketers
Compare the leading AI writing platforms to find the right tool for your workflow.
🎨 Best AI Image Generation Tools
Explore and compare the top AI image generators, including Midjourney, DALL·E, Adobe Firefly, Leonardo AI, Ideogram, and Canva AI.
🚀 Continue Building Your AI-Powered Business
Artificial intelligence is no longer a competitive advantage reserved for large companies—it’s a practical tool available to every affiliate marketer willing to learn and adapt. By combining high-quality content, strategic SEO, professional visuals, and the right AI tools, you can build a website that not only attracts visitors but also earns their trust.
Keep learning, keep experimenting, and keep creating. The skills you develop today will continue to pay dividends as your website grows and your affiliate marketing business evolves.
Connect your image work to useful distribution with the Reels, Shorts, Pins, and email repurposing workflow. Choose the asset from the article’s actual message and avoid depicting generated imagery as product-test evidence.
Check costs, commercial terms, and privacy
The official plan comparison, checked October 12, 2026, lists monthly prices of $10 Basic, $30 Standard, $60 Pro, and $120 Mega. Check current billing and features before paying. Choose a plan for a real production need; a subscription does not establish that the resulting content will earn money.
Midjourney’s commercial-use guidance includes exceptions: upscaling another user’s image does not transfer ownership, and a business grossing over $1 million annually needs Pro or Mega for its company’s commercial use. Review the linked terms for your situation. This guide does not determine copyright protection or authorize using third-party material.
The Stealth documentation says the feature is available on Pro and Mega, but creations in public Discord channels remain visible there. Check where you are generating and the visibility settings before uploading sensitive references. A privacy setting is separate from permission to use a reference image.
For the text that will accompany an image, use the affiliate prompt library or the Claude evidence-to-review workflow. This article is an editorial workflow guide; the example prompts have not been benchmarked against other image tools.